Basic techniques for digital infrared photography
 At
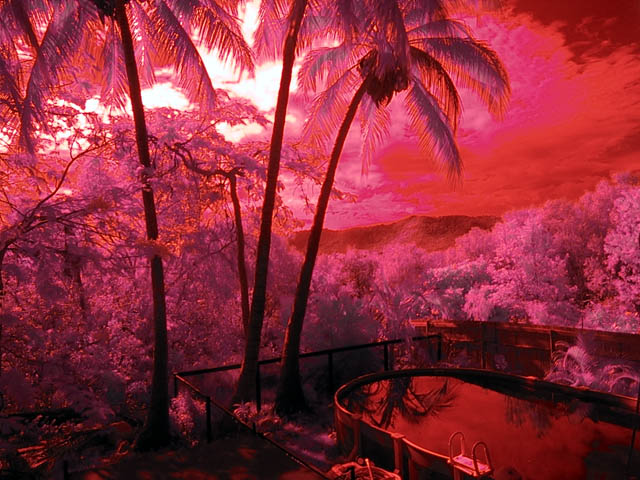
the simplest, you just attach (or hold, if like my camera yours will not accept
standard filters) your infrared filter over the lens and take your picture.
The result will look like the photo at the right. You may need to turn on your
slow-shutter-speed mode if your camera has one, turn off the builtin flash,
and put the camera on a tripod. This is because you will get very slow shutter
speeds, and your camera may well fire the flash, which is at best a waste of
time for landscape shots, and if you are holding the filter in front of the
lens, may result in reflections back into the lens from the filter. You may
also need, or want, to previes the image and lock the focus before applying
the filter, as it can be pretty hard to see what's happening on the builtin
LCD screen with the filter in place. A tripod makes this easier.
At
the simplest, you just attach (or hold, if like my camera yours will not accept
standard filters) your infrared filter over the lens and take your picture.
The result will look like the photo at the right. You may need to turn on your
slow-shutter-speed mode if your camera has one, turn off the builtin flash,
and put the camera on a tripod. This is because you will get very slow shutter
speeds, and your camera may well fire the flash, which is at best a waste of
time for landscape shots, and if you are holding the filter in front of the
lens, may result in reflections back into the lens from the filter. You may
also need, or want, to previes the image and lock the focus before applying
the filter, as it can be pretty hard to see what's happening on the builtin
LCD screen with the filter in place. A tripod makes this easier.
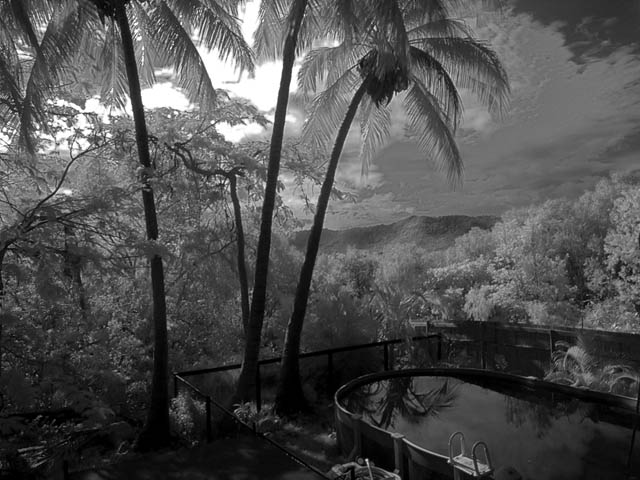
 The
image you get can be used as is, or by changing it to grayscale, you get something
that looks like a standard B&W IR photo, like the image to the right.
The
image you get can be used as is, or by changing it to grayscale, you get something
that looks like a standard B&W IR photo, like the image to the right.
That's only the beginning of the possibilities, though. While you have the
camera on the tripod, I would suggest taking a second frame, without moving
the camera at all, without the IR filter in place. You can use the unfiltered
image, in combination with the filtered image and your image editing program,
to do some really interesting things...
next--false-colour digital IR
back--experiments in digital IR
Photographic homepage
Online gallery
All images and text on this site are copyrighted by Ross
A. Alford and may not be reproduced without permission
 At
the simplest, you just attach (or hold, if like my camera yours will not accept
standard filters) your infrared filter over the lens and take your picture.
The result will look like the photo at the right. You may need to turn on your
slow-shutter-speed mode if your camera has one, turn off the builtin flash,
and put the camera on a tripod. This is because you will get very slow shutter
speeds, and your camera may well fire the flash, which is at best a waste of
time for landscape shots, and if you are holding the filter in front of the
lens, may result in reflections back into the lens from the filter. You may
also need, or want, to previes the image and lock the focus before applying
the filter, as it can be pretty hard to see what's happening on the builtin
LCD screen with the filter in place. A tripod makes this easier.
At
the simplest, you just attach (or hold, if like my camera yours will not accept
standard filters) your infrared filter over the lens and take your picture.
The result will look like the photo at the right. You may need to turn on your
slow-shutter-speed mode if your camera has one, turn off the builtin flash,
and put the camera on a tripod. This is because you will get very slow shutter
speeds, and your camera may well fire the flash, which is at best a waste of
time for landscape shots, and if you are holding the filter in front of the
lens, may result in reflections back into the lens from the filter. You may
also need, or want, to previes the image and lock the focus before applying
the filter, as it can be pretty hard to see what's happening on the builtin
LCD screen with the filter in place. A tripod makes this easier.